![]()
The Add-In Wizard creates an Add-In which has smiley icon by default. This is not what you may want to have while developing enterprise applications.
You can add a custom icon to your Visual Studio Add-In by -
1. Place your custom icon bitmap as resource in your satellite dll file
2. Refering to the Id number of this resource
3. Modifying your AddNamedCommand2() function to set MSOButton parameter to false
Step 1: Add a New Resource Item to your Addin Project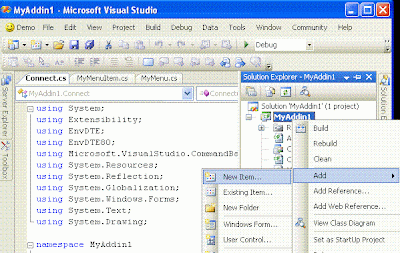
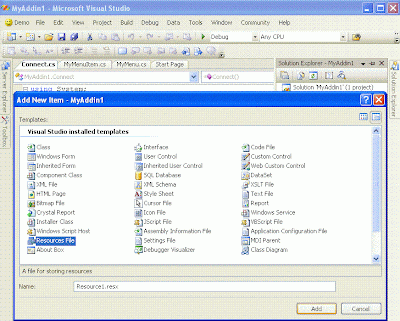
Step 2: Click on Show All Files on tool bar of solution explorer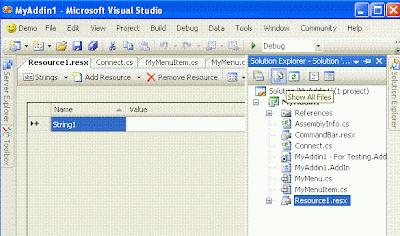
Step 3: Open Resource1.resx Properties and select build action to none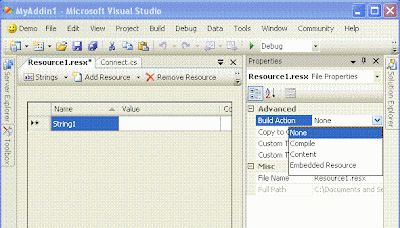
Step 4: Creating your custom Bitmap image
Open the resource editor and a new bmp image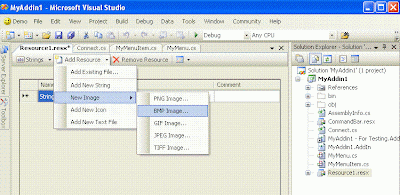
Let the image name be 'Image1'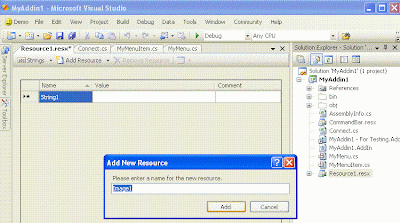
This opens your bitmap editor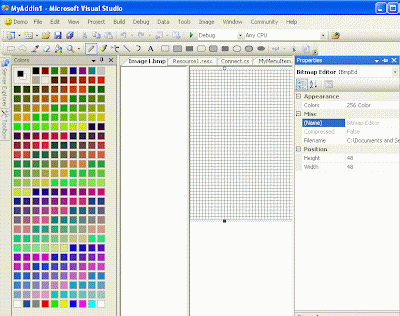
Change the image properties to 16x16 pixels and Appearance set to True Color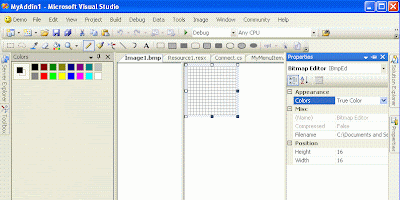
Edit the picture in the editor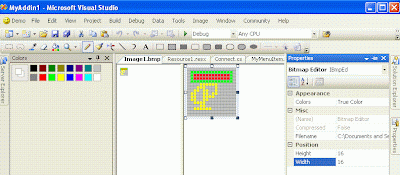
Step 5: Modify AddNamedCommand2() method to set MSOButton property to false and refer to id of your resource. In our case we have set it to '1'
public void OnConnection(object application, ext_ConnectMode connectMode,
        object addInInst, ref Array custom)
{
    _applicationObject = (DTE2)application;
    _addInInstance = (AddIn)addInInst;
    if(connectMode == ext_ConnectMode.ext_cm_UISetup)
    {
        object[] contextGUIDS = new object[] { };
        Commands2 commands = (Commands2)_applicationObject.Commands;
        CommandBar bar = ((CommandBars)_applicationObject.CommandBars)["MenuBar"];

        try

        {
            Command command = commands.AddNamedCommand2(
                    _addInInstance, "MyAddin1", "Demo", "Do Something", false, 1,
                    ref contextGUIDS, (int)vsCommandStatus.vsCommandStatusSupported +
                    (int)vsCommandStatus.vsCommandStatusEnabled,
                    (int)vsCommandStyle.vsCommandStylePictAndText,
                    vsCommandControlType.vsCommandControlTypeButton);

            //Add a control for the command to the tools menu

            if(command != null){
                command.AddControl(bar, 1);
            }
        }
        catch(System.ArgumentException){
        }
    }
}
Step 6: Right-click the Resource1.resx file in Solution Explorer and select 'Exclude From Project'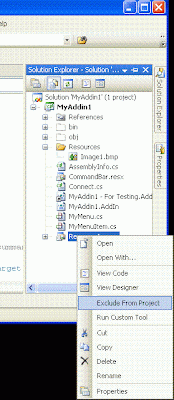
Step 7: Select 'Save All' in the 'File' menu and build the solution
Step 8: Open Resource1.resc file in your notepad. Search for all instances of 'Image1' and change them to '1'. Save the file
<data name="1" type="System.Resources.ResXFileRef, System.Windows.Forms">

        <value>Resources\1.bmp;System.Drawing.Bitmap, System.Drawing, Version=2.0.0.0, Culture=neutral, PublicKeyToken=b03f5f7f11d50a3a</value>
</data>
Step 9: Rename the Image1.bmp file in the Resources folder of your Add-In to '1.bmp'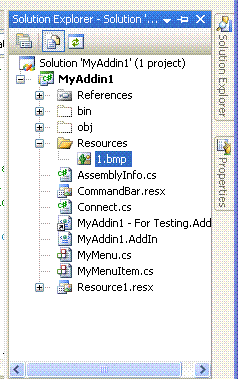
Step 10: Build the satellite Dll using the following two commands
Resgen Resource1.resx
Al.exe /embed:Resource1.resources /culture:en-US /out:
Step 11: Create a new folder 'en-US' under the add-in's dll directory (/bin) as we typed en-US in culture information for Al.exe
Step 12: Copy
Step 13: Run the Add-In project and you will find your custom icon in the menu bar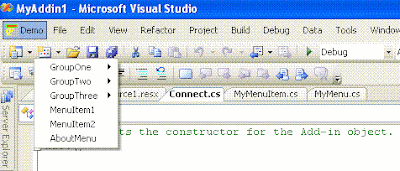
Search This BlogApr 5, 2009Visual Studio - Creating custom icon for your Visual Studio Add-In (plugin)
Subscribe to:
Post Comments
(
Atom
)
|


No comments :
Post a Comment